


How to get glass hair at home is one of the most searched beauty questions of 2026 and it’s not hard to understand why. The glass hair trend has exploded across TikTok and Instagram, with women everywhere chasing that ultra-smooth, mirror-like, light-reflecting finish that makes hair look almost digitally enhanced in real life.
But here’s what most tutorials miss: glass hair isn’t a styling trick. It’s a hair health achievement. You can’t flat iron your way to glass hair if your hair is damaged, porous, or frizzy at the structural level. The finish has to come from inside the hair shaft first and then be enhanced with the right products and technique on top.
This guide covers both the repair foundation and the styling method so you can actually achieve glass hair at home, not just for one photo, but consistently.
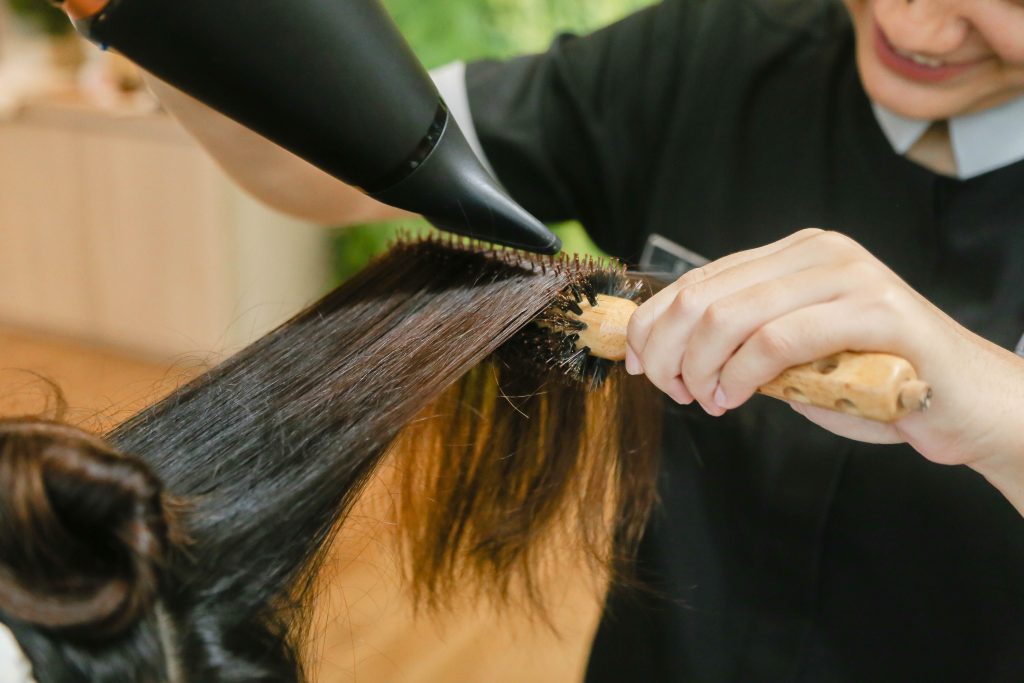
Table of Contents
What Is Glass Hair?
Glass hair refers to hair that is so smooth, shiny, and frizz-free that it reflects light like a mirror or a pane of glass. The glass hair trend has gained massive popularity on social media with women seeking deep nourishment and gentler formulas to achieve it rather than heavy products or aggressive heat styling.
The key characteristics of true glass hair:
- Zero visible frizz or flyaways
- High-gloss light reflection
- Smooth, flat cuticle layer
- Movement without separation or puffiness
- Looks polished whether air-dried or blow-dried
Why Most Women Can’t Achieve Glass Hair
The number one reason glass hair fails at home is damaged hair cuticles. High humidity disrupts the hair’s natural structure and for damaged, porous hair, the cuticle layer that should lie flat instead lifts and catches moisture from the air, creating exactly the frizz that glass hair requires the absence of.
If you want to understand exactly why this happens, our post on why your hair frizzes the moment you step outside explains the science in detail.
The solution isn’t more heat or more product but it’s repairing the cuticle so it lies flat naturally. That’s the foundation everything else builds on.
How to Get Glass Hair at Home: 10 Steps
Step 1 — Start With a Clarifying Shampoo
Knowing how to get glass hair at home starts with a clean foundation and buildup is the silent enemy of shine.
Product buildup from dry shampoos, serums, and styling products prevents light from reflecting cleanly off the hair shaft. Before starting your glass hair routine, use a clarifying shampoo once a week to remove all buildup and start with a clean base.
What to use: Any sulfate-based clarifying shampoo — Neutrogena Anti-Residue or Kenra Platinum Silkening Shampoo both work well.
Pro tip: Only clarify once a week maximum — over-clarifying strips natural oils and makes glass hair harder to achieve.
Step 2 — Use a Molecular Repair Treatment
This is the most important step most women skip. Glass hair requires a smooth, flat cuticle and if your hair is damaged from bleaching, heat, or chemical processing, no amount of styling will create a lasting glass finish.
The K18 Leave-In Molecular Repair Mask is the most effective at-home repair treatment available right now. Its patented K18Peptide™ technology reconnects broken polypeptide chains inside the hair cortex, giving the structural foundation that glass hair requires. Apply it on damp hair for 4 minutes after shampooing. No rinse required.
Why it matters for glass hair: Repaired hair has a smoother cuticle layer that reflects light evenly which is literally what creates the glass effect. You can’t fake this with styling products if the underlying structure is compromised.
Step 3 — Apply a Leave-In Conditioner for Frizz Control
After your repair treatment, apply a lightweight leave-in conditioner while hair is still damp. This seals moisture into the hair shaft and begins the frizz-prevention process before heat is even involved.
The It’s A 10 Miracle Leave-In is one of the best options for glass hair specifically. Its combination of frizz control, heat protection, and shine enhancement in one product does exactly what glass hair requires. Apply 2-3 sprays through mid-lengths and ends before any heat styling.
What to avoid: Heavy creams or oils at this stage because they weigh hair down and reduce the light-reflective quality that makes glass hair distinctive.
Step 4 — Apply Heat Protectant
Glass hair requires heat — a blow dryer and flat iron are almost always part of the process. Skipping heat protectant at this stage damages the very cuticle you just repaired in Steps 1 and 2.
Apply a heat protectant spray or serum evenly through damp hair before blow drying. Look for products that protect up to 450°F.
Best options: Tresemmé Thermal Creations or CHI 44 Iron Guard — both available on Amazon under $15.
Step 5 — Blow Dry With a Round Brush
The blow dry is where how to get glass hair at home becomes a technique rather than just a product question. Use a medium-to-large round brush and work in sections — pulling each section taut with the brush while directing the airflow downward along the hair shaft.
Directing heat downward is critical — it pushes the cuticle flat rather than lifting it, which is exactly what you need for the smooth, reflective surface glass hair requires.
Pro tip: Finish each section with a blast of cool air before releasing — this sets the cuticle in a flat position and dramatically increases shine.
Step 6 — Section and Flat Iron Properly
Flat ironing is a critical part of how to get glass hair at home and it’s different from regular straightening. The goal isn’t just to remove waves — it’s to create a mirror-smooth surface.
Work in thin sections — no thicker than one inch. Thicker sections don’t get even heat distribution and result in patches of frizz that break the glass effect.
Temperature: 380-400°F for thick or coarse hair. 320-350°F for fine or color-treated hair. Going too hot causes the bubble damage that creates rough patches.
Speed: Move the iron slowly and steadily — fast passes leave sections undertreated. One slow, smooth pass is better than three fast ones.
Step 7 — Use a Gloss or Shine Serum Immediately After
While hair is still warm from the flat iron, apply a small amount of gloss serum or lightweight hair oil to the surface. The warmth helps the product spread evenly and the cuticle absorbs it better while open from the heat.
Lamellar water — a lightweight water-based treatment that smoothes and adds shine — is one of the standout products for achieving the glass hair look in 2026. L’Oreal Elvive 8 Second Wonder Water is the most accessible version and is available on Amazon.
Amount: Less than you think. For shoulder-length hair, a 5 cent piece sized amount of serum is sufficient. Too much creates grease, not glass.
Step 8 — Finish With a Light-Hold Hairspray
The final styling step in how to get glass hair at home is a light-hold hairspray that locks the smooth surface in place without stiffness. The key word is light — heavy hairsprays create a crunchy finish that kills the glass effect immediately.
What to use: L’Oreal Elnett Satin or Kenra Platinum Silkening Mist — both known for their fine, flexible hold that doesn’t compromise shine.
Application: Hold the can 12 inches from your head and mist lightly from underneath — this sets the style without flattening or dulling the surface.
Step 9 — Address Flyaways With a Mascara Wand
Flyaways are the enemy of glass hair. Even one or two visible strands around the hairline break the smooth silhouette. The fastest fix is a clean mascara wand or toothbrush lightly coated with hairspray — run it gently over flyaways to smooth them flat without disturbing the rest of the style.
This is one of the most underrated glass hair tricks used by professional stylists — it costs nothing and takes 30 seconds.
Step 10 — Protect the Style Overnight
Achieving glass hair is work — protecting it overnight means you can extend it for 2-3 days rather than starting from scratch every morning.
The final step in how to get glass hair at home is protecting the finish overnight — sleep on a silk or satin pillowcase. A silk pillowcase maintains the smooth cuticle position you spent 45 minutes creating.
Alternatively, wrap hair loosely in a silk scarf before sleeping — this is the technique used by women with naturally straight hair to extend glass hair for up to 3 days.
Best option on Amazon: OLESILK 100% Pure Mulberry Silk Pillowcase — consistently one of Amazon’s top-rated sleep accessories for hair health.
Glass Hair Products Ranked by Importance
Understanding how to get glass hair at home means knowing which products do the heavy lifting.
| Product | Role | Budget Option | Premium Option |
|---|---|---|---|
| Clarifying shampoo | Remove buildup | Neutrogena Anti-Residue | Kenra Platinum |
| Repair treatment | Fix cuticle structure | — | K18 Leave-In Mask |
| Leave-in conditioner | Frizz control and heat protection | It’s A 10 Miracle Leave-In | Olaplex No.6 |
| Heat protectant | Protect from styling damage | Tresemmé Thermal | CHI 44 Iron Guard |
| Shine serum | Surface gloss | L’Oreal Wonder Water | Olaplex No.7 |
| Light hairspray | Lock the finish | L’Oreal Elnett | Kenra Platinum Silkening |
| Silk pillowcase | Protect overnight | Amazon Basics Satin | OLESILK Mulberry Silk |
How Long Does Glass Hair Last?
With the right products and technique, glass hair lasts 2-3 days for most hair types. The biggest factors affecting longevity are humidity, sleep protection, and how often you touch your hair during the day.
Day 1: Full glass effect — maximum shine and smoothness
Day 2: Refresh with a light mist of shine spray and a quick flat iron pass on any areas that have lost their smoothness
Day 3: Dry shampoo at the roots only, another light shine spray pass — most women find this is the maximum before a full wash is needed
People Also Ask About How to Get Glass Hair at Home
What hair type is best suited for how to get glass hair at home?
Glass hair works best on naturally straight or slightly wavy hair — these textures have the flattest natural cuticle structure. Curly and coily hair types can achieve a version of glass hair but require more intensive repair treatments and more time with heat tools. The key for all hair types is deep nourishment and gentle formulas rather than heavy products and aggressive heat.
Does glass hair damage your hair?
The glass hair process involves heat — which always carries some damage risk. Using a molecular repair treatment like K18 before styling and a quality heat protectant every session minimizes damage significantly. Doing glass hair more than 2-3 times per week without repair treatment between sessions can lead to cumulative damage over time.
Can you get glass hair without a flat iron?
Yes — but it’s significantly harder and requires very specific product choices. A quality blow dry with a round brush using the correct technique can achieve 70-80% of the glass effect. For the full mirror-like finish, a flat iron pass is almost always necessary.
How do you get glass hair to last in humidity?
Start with a repair treatment to smooth the cuticle structure — damaged, porous hair absorbs humidity and frizzes fastest. Apply an anti-humidity finishing spray as your last step. Humidity disrupts hair’s natural structure most severely in already-damaged hair — which is why repair is the foundation of humidity-resistant glass hair.
What is the difference between glass hair and sleek hair?
Sleek hair is straight and smooth. Glass hair is sleek hair taken to its maximum expression — it has a specific light-reflective quality that makes it look like it’s literally shining from within rather than just lying flat. The difference is in the level of product layering, technique precision, and crucially, the health of the underlying hair structure.
Is glass hair the same as the wet look?
No — the wet look uses heavy gels and creams to simulate the appearance of wet hair. Glass hair is dry, lightweight, and naturally reflective. The two aesthetics look superficially similar in photos but feel completely different and require entirely different products.
What products should I avoid for glass hair?
Avoid heavy creams, thick oils, and strong-hold gels — these weigh hair down and create a greasy rather than glassy finish. Also avoid dry shampoos on the mid-lengths and ends as they create a matte, powdery residue that kills the light reflection glass hair depends on.
How do I get glass hair if my hair is damaged?
Start with 4 weeks of twice-weekly K18 Leave-In Mask treatments before attempting glass hair styling. Damaged hair has a rough, raised cuticle that scatters light rather than reflecting it — no amount of heat styling creates glass hair on severely damaged hair. Repair first, style second.
Final Verdict
Knowing how to get glass hair at home in 2026 comes down to one non-negotiable truth: you can’t style your way to glass hair if your hair isn’t healthy enough to hold it. The ten steps above show exactly how to get glass hair at home as a complete system. Start with repair, build the routine correctly, and the mirror-like finish follows naturally.
The ten steps above work together as a system. Skip the repair treatment and your glass hair lasts an hour. Skip the silk pillowcase and you start from scratch every morning. Follow all ten and you have a glass hair routine that works consistently — not just for one perfect photo.
The two products that make the biggest difference: K18 Leave-In Mask for repair, It’s A 10 Miracle Leave-In for frizz control and heat protection. Everything else builds on the foundation those two create.